Raise your hand if you have more than an hour a day to do your makeup? Okay, now if your hand is raised, then use it to keep turning pages because this tutorial is not for you. (You’re an everyday “glamazon,” and I completely admire and respect you for that).
As for the rest of us, take heart. It’s possible to look fresh and fabulous even if you are short on time. I don’t know about you, but the last time I left the house, I was in such a hurry I didn’t realize I put on mismatched ankle boots before I walked out the door! If you are like me, you may be balancing parenting, a demanding career, and other responsibilities and obligations. This article is for you. You are not alone, my friends!
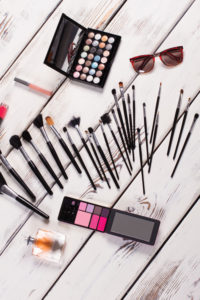
I want to share with you the tools and tricks you need to create a fresh, fabulous, and finished look in five minutes flat. For these two looks, I’ve included budget conscious and natural product alternatives.
Meet Andrea, a 25-year-old dental assistant who says her biggest makeup challenge is covering up dark circles. Her skin type is normal to dry. She describes her approach to makeup as “one extreme or the other.” Andrea said, “I either get glammed up completely, or I wear absolutely nothing. I would really like to learn how to do a makeup look that is natural that just makes me feel like an enhanced version of myself.”
After her makeup demonstration, Andrea said, “This is perfect, I love how natural it is, and that the lips are a stain. I feel very girly and fresh. This is definitely something I could do in five minutes!”

STEP 1: COVER
For normal to dry skin, apply small dabs of foundation to your forehead, nose, and cheeks. Then, blend with a synthetic sponge in a downward motion. Use a slight stippling (patting) motion for added coverage. We used MAC Studio Waterweight Foundation ($33). Almay Smart Shade CC Cream ($10) is a great alternative. My favorite sponge used to be the Original Beautyblender ($20) until I discovered Real Techniques Miracle Complexion Sponge ($5), which we used here. This sponge gives your skin a nearly airbrushed finish; it’s amazing!

STEP 2: CONCEAL AND HIGHLIGHT
For dark under eye shadows, try IT Cosmetics Eyelift In A Tube ($29). It allows you to use one end to conceal and the other to apply a gorgeous, semidewy highlight. Use the applicator by applying the “Bye Bye Under Eye Concealer” from the inner corner, covering any shadowy areas and blemishes, to the sides of the nose. Next use the “Hello Light Liquid Brightener” under the eye, on top of the cheekbone, and up to the temple in the center of the forehead. Also apply above the center of your top lip. Then fully blend using a stippling motion with your sponge. Available at a fraction of the price, e.l.f. Studio Under Eye Concealer and Highlighter ($3) works similarly.

STEP 3: CONTOUR
Use a bronzer to achieve an easy contoured effect in a minimal amount of time. For dry skin, I recommend applying a cream bronzer with a brush to the top of the forehead and under the cheekbone, along the jaw line and subtly to both sides of the nose. A synthetic brush is best when working with cream blushes or bronzers, as natural hair brushes tend to soak up cream products. We used Sonia Kashuk Undetectable Creme Bronzer ($11) in warm tan. This product is an excellent alternative for Chanel Bronze Universel ($48). I honestly can’t tell the difference, and who doesn’t love a deal?
STEP 4: BROWS
Naturally full looking brows hit the runway this season, so tinted brow gels are the way to go. Select a shade that matches your brow color, or one that is a few shades darker if your brows are naturally blonde. We chose to warm up Andrea’s brows slightly with Anastasia Beverly Hills Tinted Brow Gel ($22) in auburn. Comb the brow tint upward through the brows and then gently lay the hairs down at the top combing toward the outward corner. Replicate the look with NYX Cosmetics Tinted Brow Mascara ($9).

STEP 5: CURL
Curling your eyelashes is optional, but do consider including this step if you have straight lashes. Start at the base of the lash where your lid meets the root and apply gentle but firm pressure. Hold for two seconds and move up the lash curler just a touch and repeat for another two seconds.

STEP 6: SHADOW
With your pointer finger, sweep a neutral cream shadow from lid to crease and blend softly onto the brow bone just above the crease. Andrea is wearing MAC Indianwood Paint Pot ($22.) For a less expensive alternative try Maybelline Eye Studio Color Tattoo Cream Shadow ($6) in “Bad to the Bronze.”

STEP 7: MASCARA
For full lashes in a hurry, sweep one or two coats of a volumizing mascara from root to tip on the top and bottom lashes. I love Maybelline Pumped Up! Colossal Volum’Express ($6).
STEP 8: LIP AND CHEEK
Want a fresh look? Use the applicator to stripe a line of Benefit Posietint ($30) cheek stain just above your cheek contour on the apples of your cheek. Pat and blend. Next, apply the stain to your lips and blend with your fingertip. For a less expensive alternative try Etude House Fresh Cherry Tint ($8). For a glossy texture, add a dab of gloss to the center of your lips.